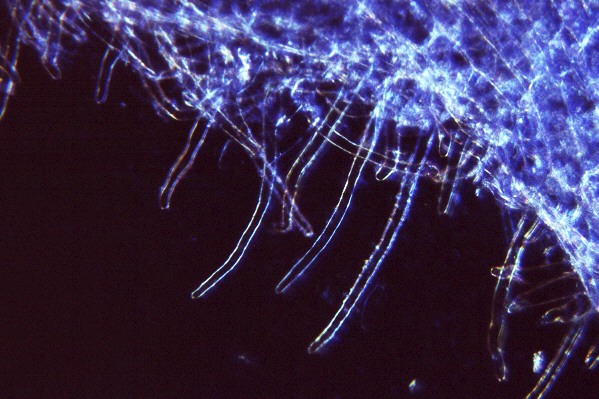
Clover root hairs (dark field)
This experiment is being developed by EDVOTEK as a kit for the teaching
lab as part of a Phase 2 NSF-SBIR grant project.
One of the nicest methods for growing root nodules in the teaching
lab uses Seed Germination Pouches (product of mega-international:
http://mega-international.com). Look at the samples displayed with
this poster.
Using the pouches, add 20 mL of a nutrient solution to the pouch (Hoaglands solution works well, or use Miracle-Gro diluted to ¼ strength). If desired, make this into a nutrition experiment by leaving out nitrogen, etc. Sow seeds of clover (Ladino clover is the type displayed here) in the trough at the top of the pouch. If desired, inoculate the seeds with a commercial Rhizobium inoculant (this seems to be unnecessary, generally). Replenish the solution in the pouch with water as necessary to keep the paper liner from drying. Nodules develop on the roots within 3-4 weeks. These can be removed and examined under the light microscope. See below.
As an alternative to seed germination pouches, sow seeds on moistened vermiculite or perlite in 7 oz. clear plastic specimen cups (Fisher cat # 14-375-127). As above, use a nutrient solution for this. These are very inexpensive and make great disposable beakers for the lab. Cover the cups with plastic wrap to prevent them from drying out. Replenish with water as necessary. As the plants grow, a second cup can be inverted over the first and taped in place to make a mini greenhouse. See the samples displayed with the poster. With luck, you will see nodules forming against the clear plastic sides of the cup. If nodules are not observed, turn out the seedlings and rinse the potting material from the roots to get a better look.
Once nodules have formed on the roots of your seedlings, prepare wet mount slides of them for closer observation. Using the light microscope, students should look first at intact nodules. Then, tapping on the cover glass with the handle end of a dissecting needle or the eraser end on a pencil, they will rupture the nodules and see the release of bacteroids from within. See the pictures attached.
See the photos of nodules below:
Clover root hairs (dark field)
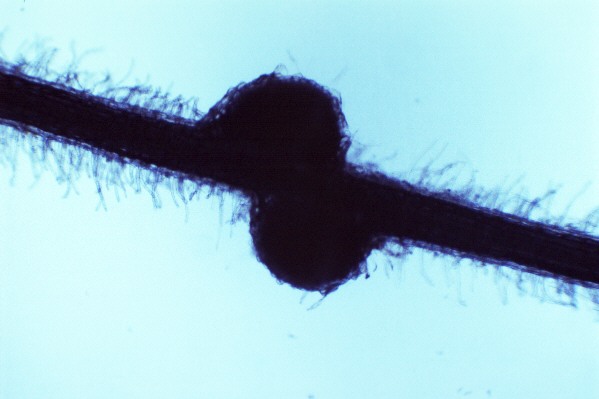
Two nodules on clover root. This is a wet mount of fresh material.
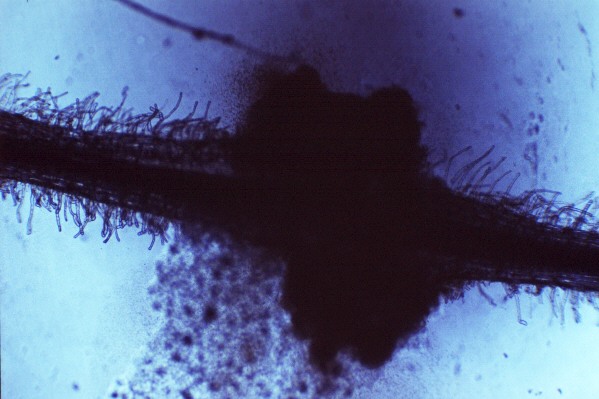
Nodules broken open by tapping on the wet mount preparation with the
blunt end of a dissecting needle to show the release of bacteroids.